
How to Edit iPhone Videos on a Mac and Preserve Their Quality
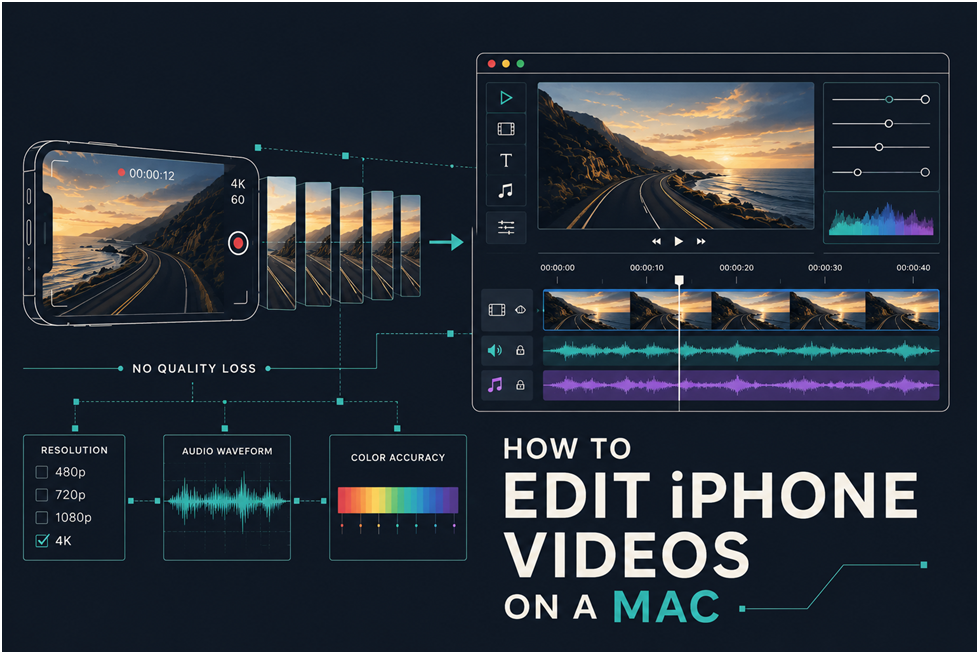
An iPhone records better video than most people actually use after editing. Quality often drops between the phone and finished upload, not during recording. Transfer and export cause common quality problems when settings are chosen incorrectly. This guide moves iPhone footage through the Filmora video editor carefully. The video editor Mac owners choose matters when preserving original footage quality. Transfer and export settings also help maintain quality throughout the editing process.
Step 1. Transfer the Original iPhone Files to the Mac
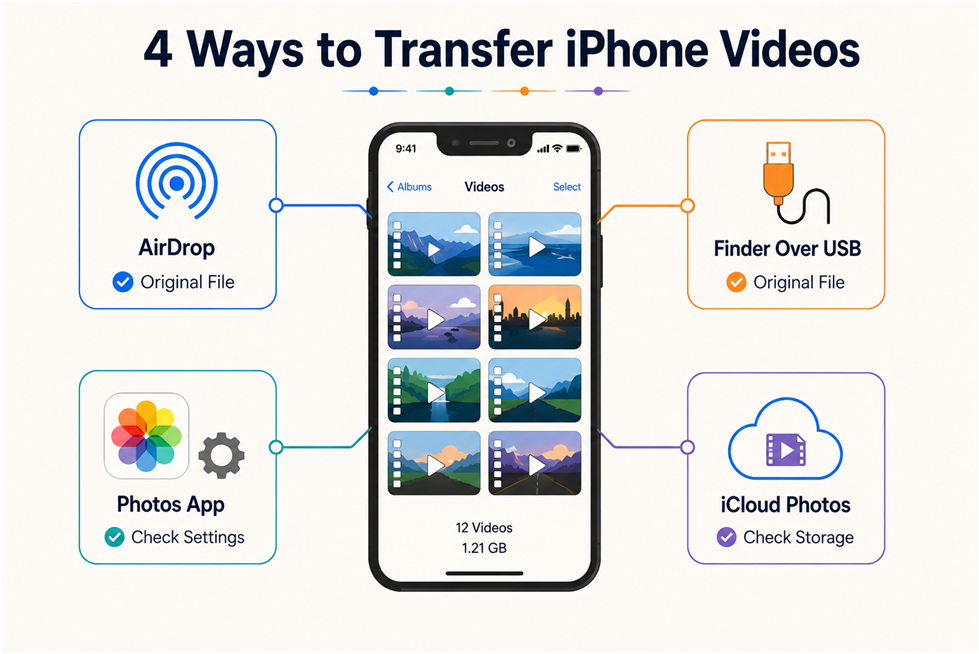
Choosing the right transfer method gives editing software for Mac original-quality source footage. The table below compares transfer routes and explains what reaches your Mac intact:
| Transfer Route | What Arrives | Worth Knowing |
| Airdrop | The original file in most cases | Awkward for large batches of clips |
| Photos App | Whatever the transfer setting allows | Check that setting before you start |
| Finder Over USB | The original file, at cable speed | Most reliable for a full shoot day |
| iCloud Photos | Depends what is stored on the device | Optimize iPhone Storage can leave a smaller copy |
One Photos setting controls how iPhone footage transfers onto your Mac computer. Automatic can convert HEVC video to H.264 when compatibility problems appear during transfer. Keep Originals transfers the source file without changing its original video format. Save untouched files in one folder, then create duplicates before starting edits.
Step 2. Check the Footage Before Creating the Project
Checking these details first helps Filmora Mac handle your iPhone footage without issues. If you want to avoid editing problems, review each setting in the table:
| What to Check | Why It Changes the Edit |
| Resolution | 4K leaves room to crop, while 1080p survives very little reframing |
| Frame Rate | Mixing 30 and 60 fps in one project makes motion look uneven |
| Orientation | Portrait and landscape clips do not share a timeline comfortably |
| Dynamic Range | Recent iPhones record Dolby Vision HDR unless it was switched off |
| Codec | High Efficiency writes HEVC, which 4K60 and HDR both require |
| Free Space | The edit needs room for previews and the finished export as well |
Any video editing software for Mac can open these files because macOS supports HEVC. These checks help plan your editing workflow rather than determine successful clip imports.
Step 3. Import the iPhone Footage into Filmora
Once the footage is understood, the project can be built around it instead of fought against. Settle the aspect ratio first, then bring the clips in.
Match the Project to the Footage
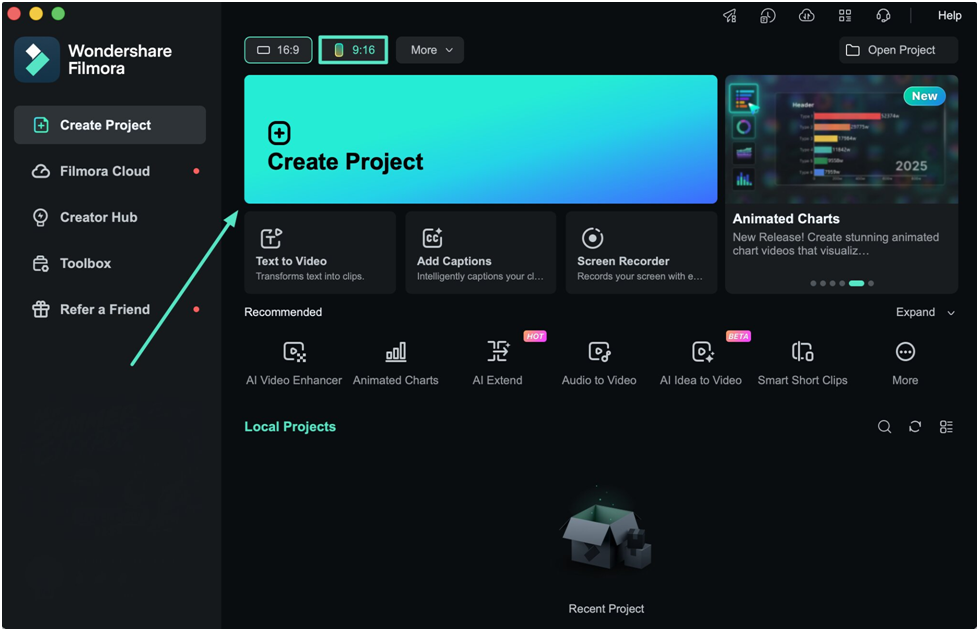
Open Filmora and pick the “Aspect Ratio” that matches your shot rather than the one you wish they had. Choose the “9:16” for iPhone show and set the project frame rate to match the footage too. Once done, press the “Create Project” option.
Sort the Clips Before Building
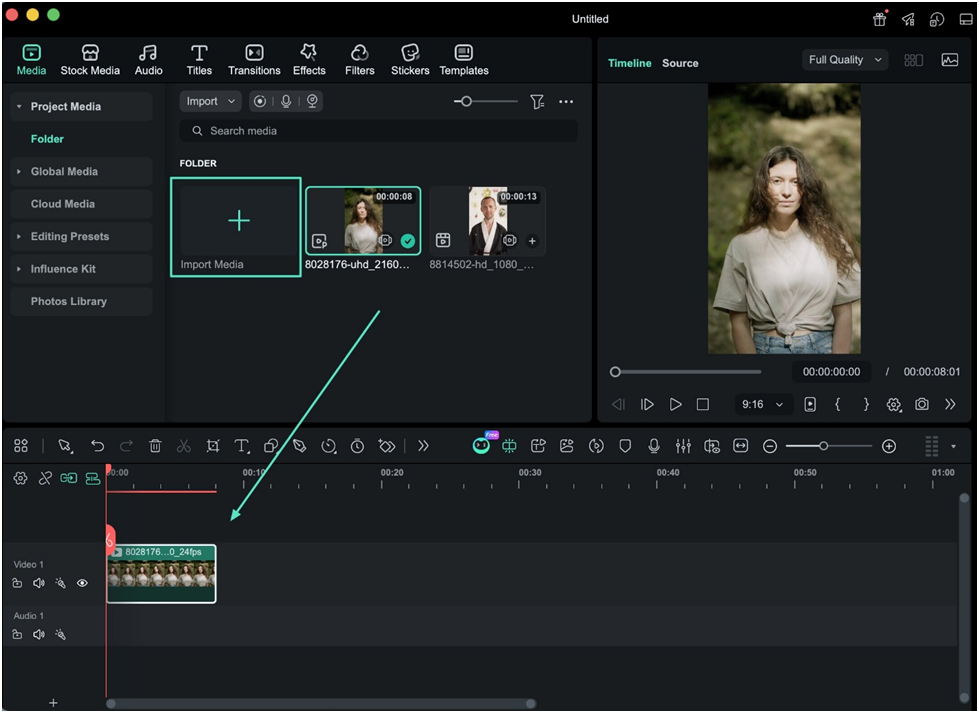
Then, import all your clips in the Filmora Media Library. Group clips by orientation rather than by the order they were shot, since portrait and landscape need different treatment later. Drag and drop only your chosen takes onto the timeline and leave the rest sitting in the library. Users on PCs can explore the Filmora video editor for Windows for a similar editing experience.
Step 4. Trim and Reframe the Main Shots
With chosen takes arranged, start trimming weak footage before making any framing changes. Use the table below to decide which clips need reframing during editing:
| Worth Reframing | Better Left Alone |
| A wide shot with the subject off to one side | A clip already framed for the chosen ratio |
| 4K footage that can lose pixels without softening | 1080p footage that would visibly soften |
| A landscape clip going into a vertical edit | A portrait clip staying in a portrait edit |
| A shot where the subject moves across frame | A locked-off shot with nothing to follow |
The Filmora Mac build includes Auto Reframe, which tracks subjects during ratio changes. This feature helps landscape clips fit vertical edits without fixed center cropping issues. For 1080p footage, black bars preserve more detail than enlarging the entire clip.
Step 5. Adjust Color, Sound, and Text
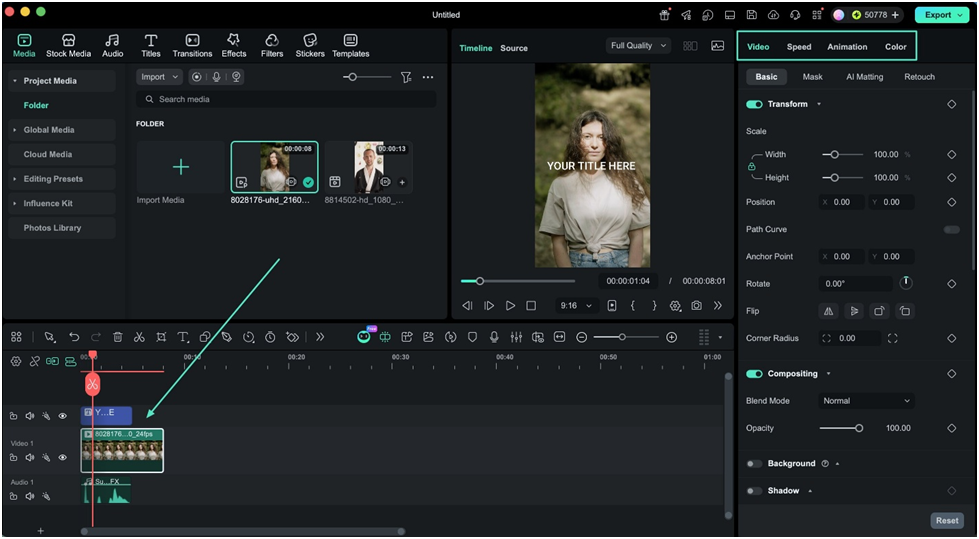
With framing complete, adjust picture and sound from Filmora’s right-side “Properties” panel. The controls below help refine footage without making unnecessary changes during editing.
- Exposure and Color: Compare your brightest and darkest shots before adjusting either.
- Speech: Raise clarity before raising volume, since phone microphones collect room noise.
- Music: Keep it well under the voice and check the balance on headphones and speakers.
Titles: Size text for a phone screen, because that is where this footage gets watched.
To manage HDR footage, open “File” and click “Project Settings” in the menu. Then, check “Color Space and choose SDR Rec.709 for standard footage, or select an HDR option when needed. Alternatively, choose the matching color space during export and enable GPU acceleration for HDR.
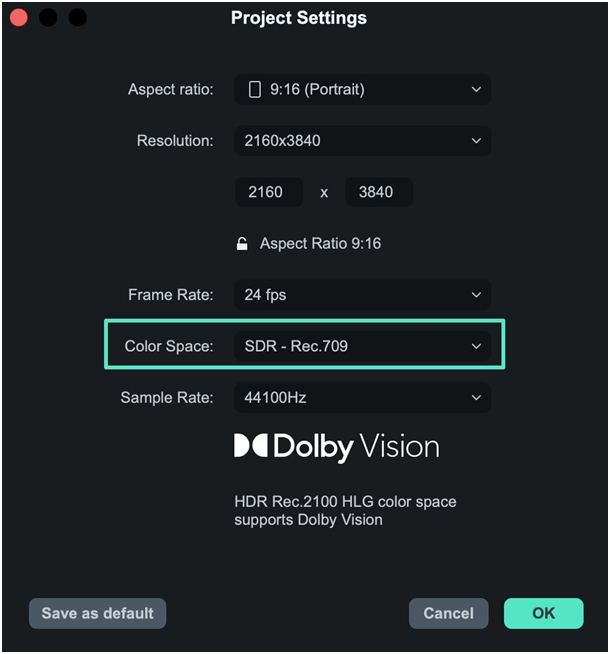
Previewing HDR requires a supported Mac display with the HDR setting turned on. However, exporting HDR takes longer than SDR, while unsupported screens may show different results. For more feature instructions, explore the Filmora editing guide covering additional tools and settings.
Step 6. Export Using Settings Appropriate for the Footage
Export settings should match your project and destination instead of following old habits. A video editor Mac workflow needs suitable settings for each destination shown below:
| Setting | YouTube Upload | Reels or Shorts | Keeping a Master |
| Orientation | Landscape, 16:9 | Vertical, 9:16 | Same as the project |
| Resolution | 1080p or 4K | 1080 x 1920 | Match the source |
| Frame rate | Match the footage | Match the footage | Match the footage |
| Format | MP4 | MP4 | Apple ProRes |
| Color Space | SDR unless the whole chain is HDR | SDR | Match the project |
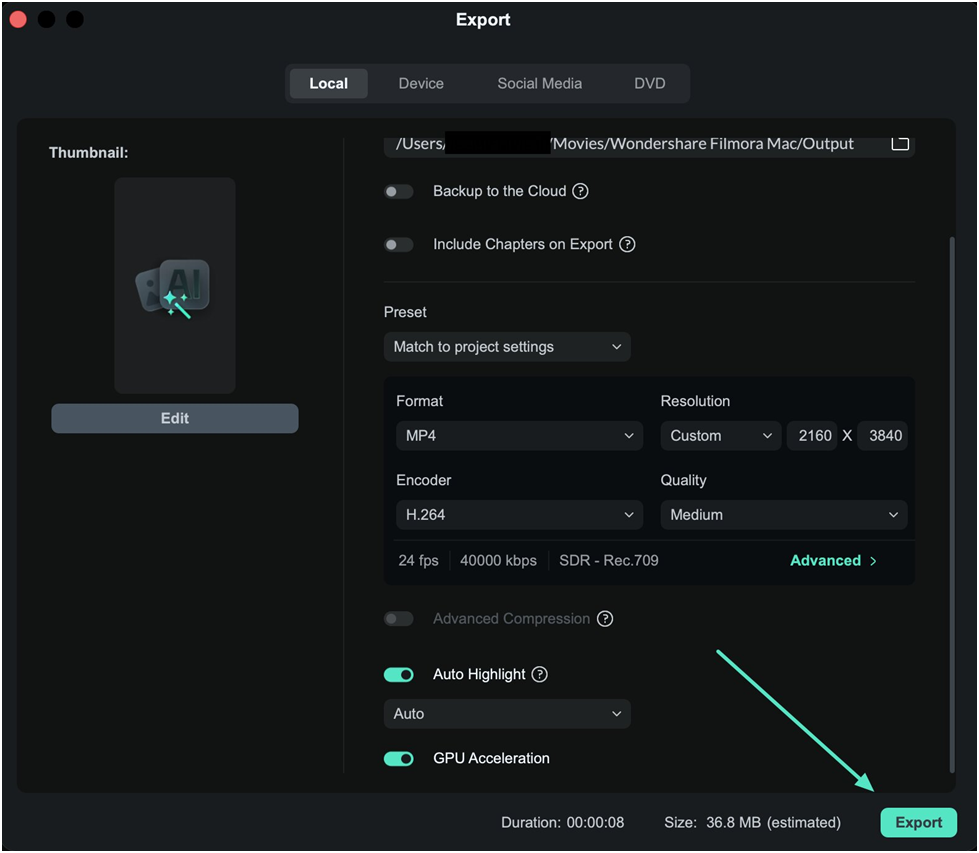
YouTube accepts many formats, so a 4K export can preserve available source detail. Vertical platforms work best when videos already match their required shape and dimensions. A ProRes master uses more storage but supports future edits with less compression. Keep the frame rate matched to your footage instead of changing it unnecessarily. When editing finishes, press “Export” to open Filmora’s export settings window. Choose the format, resolution, frame rate, and quality before saving your video file. Whichever editing software for Mac you use, avoid settings beyond the source footage. Exporting below the source settings can discard quality already present in your footage.
Conclusion
Keep original iPhone footage stored safely before making changes during the editing process. Match project settings with your footage instead of forcing unnecessary format changes. A video editor Mac workflow works best when source quality remains protected. Check the finished export on its intended phone, platform, or viewing screen.